Showing posts with label Crochet. Show all posts

Tuesday, April 24, 2012

Going around in circles

Remember a while ago I showed you this picture?
Well now is the time for the "big" reveal (it's probably not that exciting, heh!).

As you know, I have been teaching crochet.  I thought it only appropriate that I should wear something I made to each of the classes (there are 3 separate sessions).  I was good for the first and second sessions (boteh scarf to the first, and my super special birthday skirt to the second). But I needed a third, and I remembered this fabulous Japanese book I bought ages ago with thread crochet accessories. 
And so for lesson three, this was my crochet piece:
And the students loved it!  I showed a couple of them how to make it, and got all inspired by the shop's stock of Perle 8 cotton and picked out my new jewels!

So these three were born:
If you look closely, you'll see they are each slightly different.  The silver grey is the same as the red - so in accordance with the pattern.
The pewter grey alternates small and large circles:
While the sunshine yellow has a longer chain between the circles:
Details (just quickly!)
Pattern:  "p.86 Necklace" (no idea what the Japanese is, this is what it is called in Rav!), from the book which Rav tells me is called Thread Crochet Plants, by knot.  (ISBN978-4-07-257058-6) Modifications to some as noted above.
Yarn:  Red used size 20 crochet thread, the rest use Perle 8 mercerized cotton - about 3-4g of each colour. The pattern in the book I think uses size 60 thread (so much finer) but I think it works nicely in a slightly thicker cotton as well.
Hook: For the red, I used 1.25mm, for the rest I used a 1.5mm hook.
Time: A few hours for each.
This is a great demonstration of the versatility of crochet, I think. I love being able to take a pattern like this and give it a few tweaks.  And this book is so full of inspiration, there are a few more pieces I wanted to try out as well.  I still have the blue and orange/red "jewels" to play with, so expect to see more!

Friday, April 20, 2012

Crochet rocks!

Every so often in the knitting world, I come across a bit of crochet hate. Hate might be too strong, perhaps distaste might be more appropriate.  It's a bit of a shame, really, because crochet is not evil.  It has suffered due to grievous misuse in the late 60s and 70s (but then, so did knitting in the 80s, I think!). I totally accept that some knitters are not interested in crochet (and vice versa) but I've always thought they are complementary skills. And there are certainly a lot more lovely crochet patterns (eg garments that are not stiff and bulky!) around now.

In the interests of spreading the crochet love (and because I was asked!), I have started teaching crochet for beginners at one of Sydney's lovely yarn (and fabric) stores, Calico & Ivy, in Balmain.  I did my first series in February/March, and I am teaching again in May/June, as well as doing a crochet clinic for specific issues.

I worked up some samples for the shop, which I also use as the basis for the classes too, all in Debbie Bliss Baby Cashmerino, which of course the shop stocks, in a really nice range of colours.

First up, I made some granny square blocks - all with the same basic granny pattern but showing different uses of colours (shame about the terrible photo! sorry).
Then I made a cushion in the popular African Flower hexagon pattern.  This is a really versatile hex - the way I've done it shows the flowers clearly against the green (grass!) background, while if you change colours for each row it can give a different look.  There is a great flickr group dedicated to the African Flower, it is full of inspiration.
One of the loveliest things after my first series of classes finished was getting an email from one of the attendees saying she was so inspired she spent the rest of the weekend crocheting!  The best feedback you can get!

If you are in the area and looking to learn to crochet (or you can crochet and have a specific issue you need help with), give the shop a call! I am doing a weekday and weekend series of classes, both starting in mid-May.

And don't forget, Crochet Rocks!

Sunday, October 30, 2011

It's Fauxsoni, dahhhhling!

Thank goodness for Ravelry.  Otherwise I would have no idea when I even started this project.  Except that it was sometime after I moved to my current home (so in the last 3 - or is it 4 - years!).  It has been 95% finished for some time (I can't even remember that, either!).  Just waiting for me to sew a lining and sew on the handles.

Which I have now done!  So may I present the Fauxsoni Tote!

Details
Pattern:  Felted Chevron Tote by Leslie Ann Bestor, from Interweave Crochet, Winter 2007.  I do love a chevron.  I do love Missoni.  I do love a self-striping yarn.  These three combined to make a match made in heaven!  This is a very easy pattern - basically make a big piece of crochet chevron, sew it into a tube, crochet a base and sew it on (I think - I can't even remember whether it is sewn on or crocheted on!) and then felt it!  Woo hoo! 

And just in case you think to yourself, "but I have a front loader, I can't felt", well, take it from me, you can!  I think I put a pair ofold  jeans in with this to add a bit of friction, and did it on a full hot cycle, and it worked perfectly!

Felted Chevron Bag - pre felting
You can see in the before and after photos how much it shrank with the felting process.  Just the right amount, fortunately.  This is a very nice sized bag!

Felted Chevron Bag - post felting
Yarn:  The sadly discontinued Cleckheaton Vintage Hues.  Sad because it is the perfect felting yarn.  I used 7 x 50g balls of colour 1273 for the bag, but of course you could use fewer if you made the bag smaller, or used a different yarn for the base.
Hook:  7mm.

Time:  3 June 2009 - 25 October 2011.  Really!  I think I finished the bag and felted it sometime in late 2009 or early 2010.  I really can't recall... And then I had a free afternoon last weekend so I dusted off the sewing machine (literally!  Oh my was it covered in dust! Thank goodness it has a cover thingy), and sewed up a lining for it.  With pockets even!  Because I really dislike handbags without pockets for important things like your phone, purse and bus/train ticket!  And pen, lip balm, keys and tissues.  Um, I think I should have put in a few more pockets, heh!
Modifications:  I think I made the pattern as written (I may have made it longer around), but I know I added a simple single crochet edging around the top of the bag.  Just to ensure the edge was flat.  I did plan to turn it over and make a seam, but that was an ill-thought out idea, as once it was felted it was too thick to even think about that! But not to worry, it is fine as is.

I am really happy with this bag!  I love the colours and I love the way it has turned out!  Finally! (Yes, another project for Binding Off 2011!)

Friday, September 30, 2011

StashDownUnder - September 2011

I had a good month this month!  I can't say no yarn came in, because I did receive two lots of red 4ply for my Beekeeper insanity, but nothing that I bought myself!  So that's not too bad! And I somehow managed to have a HUGE knitting month, so go me! Heh!

This month:
In:  2 x 50g balls
Actual balls used:  10.5 x 50g balls
8ply equivalent: 15.5 x 50g balls (LOTS of 4ply knitting this month! plus a couple of balls donated to Guild)
metres used: 1,138m

Year to date:
Actual balls used: -7.75 x 50g balls (I might just come out neutral by the end of this year!)
8ply equivalent: 78 x 50g balls
metres used:  9001m

I thought I might as well do my Beekeeper update today too.  This month was a good month, I managed to do 34 sexypuffs - yes, more than one per day!  Hurrah!
I also tried out the crochet version, which is free on Ravelry.  I had to modify it a bit, to ensure they match my knitted puffs in terms of size, but that is easily done.
And I like the bit of texture that the crochet puffs give to the quilt.  Red and texture!  I might have to try a moss/seed stitch puff sometime soon!

Sunday, June 05, 2011

For the maths geeks

Last weekend our parents group held a combined first birthday party for our babies (are they still babies once they are one?  I guess so, since he isn't a toddler yet, but he's just so much bigger than a newborn!).  I volunteered to make the cake:

and we also did a gift exchange, so I thought I'd make one of these:

And it was fun - mostly!

Details
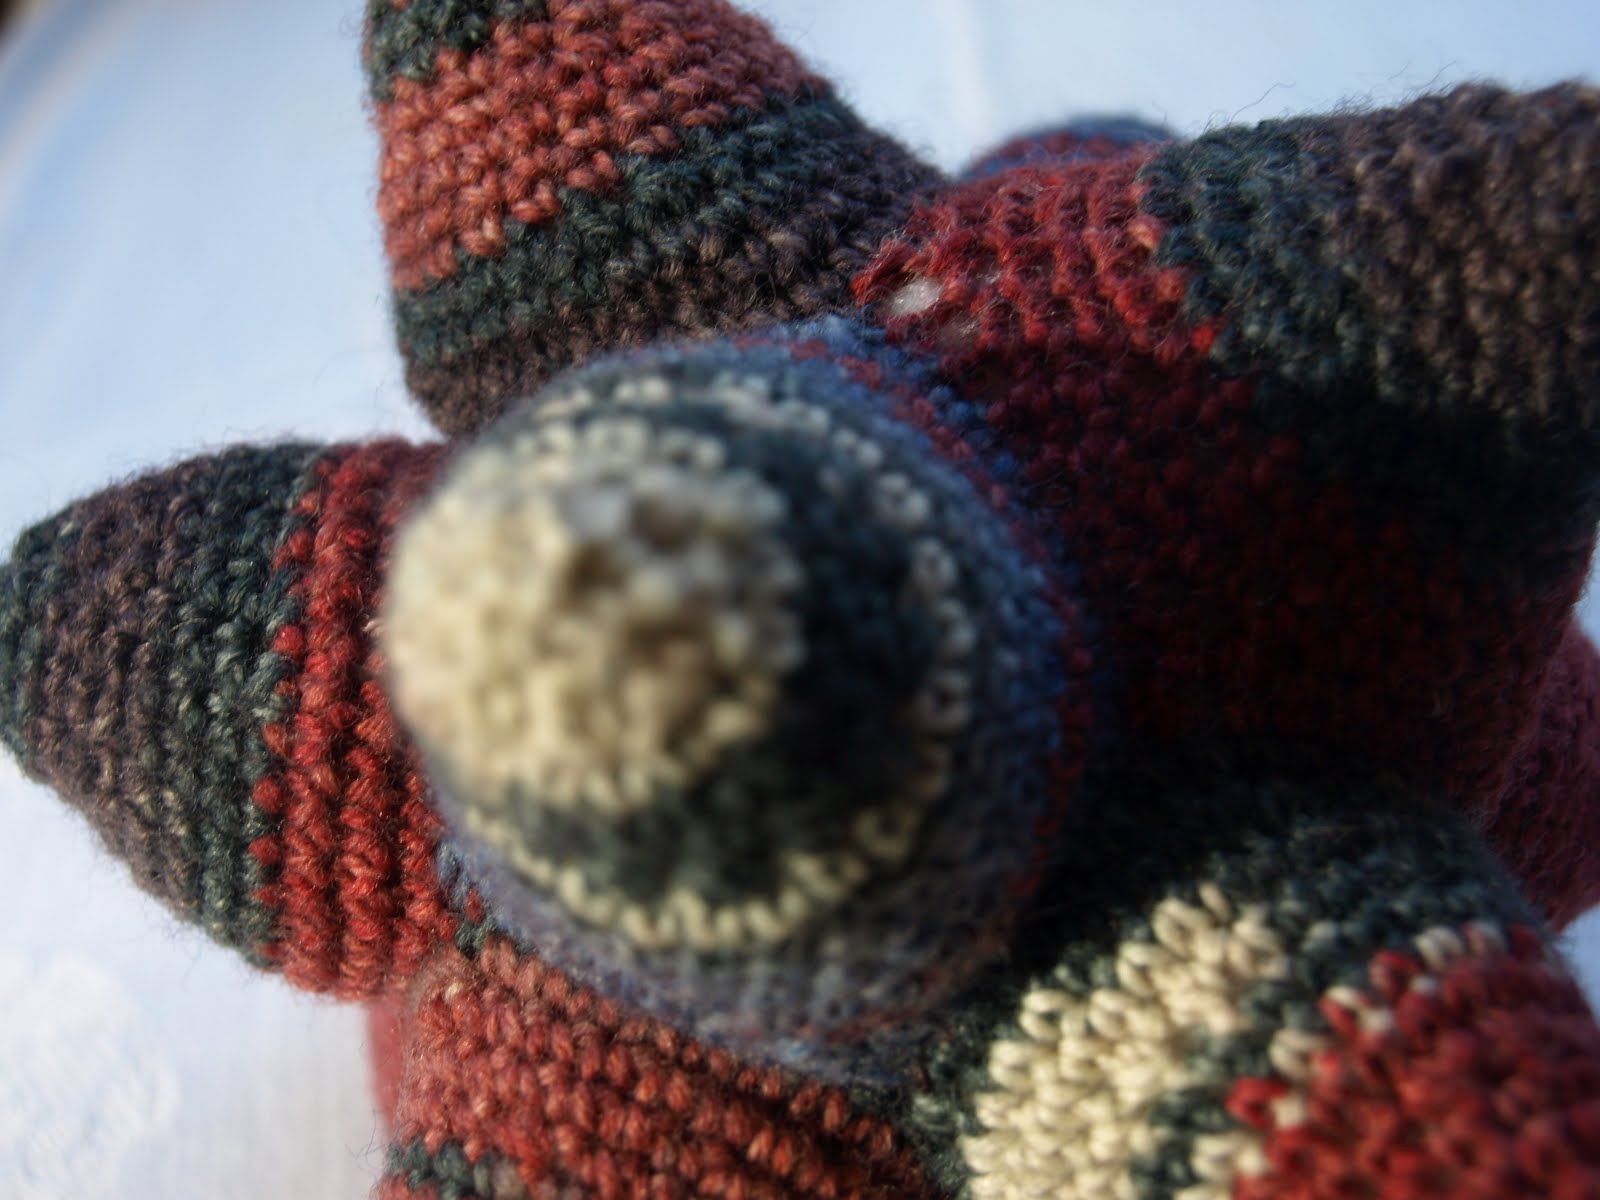
Pattern: Celestine Crochet ball by Betsy Myles - a free pattern, yay!  A few people complain on Ravelry that this is a bit of a confusing pattern, or not well written.  I think it's written fine - you start off with a chain loop and steadily decrease to the point, then add another point building on the last one (got to love a join-as-you-go project!), but I did have trouble starting off each new point, more because I kept forgetting how I got it started the last time.  I think I managed to get it right after I'd made about 8 or 9 of the points!  Oh dear!


Half done!
 So I took some pictures, so hopefully I will remember next time, because I would like to make another one, they are pretty fun, and unusual looking - it's a 12 pointed star, a sort-of dodecahedron!  I just like saying dodecahedron, really!

Foundation row for new point
Yarn: Opal 4ply sock yarn col 1232.  Only 32g, so you can easily get 3 of these from a ball of sock yarn.  Or possibly from leftovers, if you'd already made socks!  You can use any size yarn, it will just affect the size of the end product.

Hook: 3mm

Time: 20 May 2011 - 27 May 2011 - a week, not bad!  I think it took me around an hour for each point, with all the unpulling every time I started a new point and forgot how to join the darn thing so it didn't twist and was facing the right direction!

Modifications: I made the pattern as written, but rather than doing the chain first and then the crochet into the previous point(s), I did the crochet into the previous points first, then the chain.  For some reason, this was easier to work out the joining. 

There's also a small error in the pattern when starting the 11th point, you only do 7 chain, the rest are all crochet into previous points.

The last point was very fiddly, but I managed it ok.  When stuffing the ball, I also put in a cat toy to give the ball a "rattle".  I was worried the stuffing might muffle the noise, but it comes out nice and clear, without being annoying loud like some (many?!) kids toys!

Thursday, April 28, 2011

Fit for a (royal) wedding?

I do love to wear a hat to a wedding.  It's a dying tradition in Australia (perhaps everywhere) but I have done my bit to keep it alive.  There's just something about a hat that makes an outfit special.  I suppose it's partly because it's so rare to see them at weddings any more, that's what makes you stand out!

I'm seriously considering wearing a hat on Friday as I watch the royal wedding on tv ... I watched Charles and Diana, and Andrew and Sarah, and Edward and Sophie, and even Charles and Camilla.  I will totally be watching William and Kate!  I'm not a monarchist by any means, but there's just something about a royal wedding which totally appeals.  It's probably the frocks.  And the hats.  I'm sure it's the hats!

I made this one a while back, but didn't get a photo shoot for ages, and then I sort of forgot to blog it, until now!  Thanks to my friend Miss J for modelling so fetchingly for me!

Details
Pattern:  Modest Cloche by Jennifer Hansen.  I have long admired this pattern, I do love a cloche hat, and there was just something about this one, perhaps it's the flower, perhaps it's the angle of the project photograph, I don't know.  But I was glad to be able to finally make it!

Yarn:  Silky Merino by Malabrigo, 2 skeins in grey green (a lovely birthday gift from Bells).  This was actually not quite enough - I didn't have enough to do a full flower, so only managed a small one (which also curls somewhat annoyingly), but I think it's ok.  If you did the flower in a different yarn or colour, 2 skeins would definitely be enough!  This is a gorgeous yarn, especially nice to crochet with.

Hook:  2.25mm hook - the pattern suggests a 2.75mm hook - I didn't have one, so tried 3mm (too big), 2.5mm (still too big) and then 2.25mm (just right!).  I'm not actually sure I've ever seen a 2.75mm hook before, I shall have to keep an eye out for one in future.

Time:  30 January 2011 - 21 February 2011.  I actually finished the hat itself on 7 February (crochet is SO QUICK!) but tried to get some extra yarn to ensure I had enough for the full flower (via the ISO thread on the Australian Knitters board on Rav).  None was forthcoming (I knew it'd be a long shot) so I just went ahead with what I had.

And I'm pretty darn happy with it, really!  The cool texture is done by front post stitches, and the "gathered" part on the top of the head is done by varying the stitches on each row (treble at back, then transitioning through half treble to double crochet - I'm using english terminology here!).  Very clever pattern!

Now what hat to wear on Friday...I think it should have some feathers...

Wednesday, March 23, 2011

Up, down, round and round

I love me some crochet, I do, I do. It's so quick. And for the right project, so effective.

Just over two weeks after I started the Circles Scarf, it is done!
Details
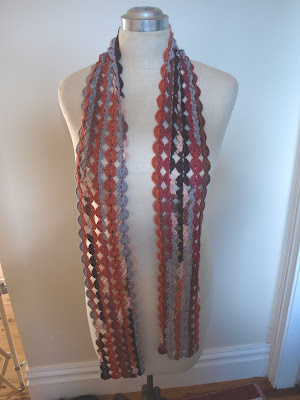
Pattern: Circles Scarf by Linda Permann, from Inside Crochet, issue 11, November 2010. At first glance, the pattern appears to be a series of round motifs attached to each other. I am not a fan of making a bunch of small motifs and joining them (either as you go or after the fact, although joining as you go is preferable, if it has to be done!) But no! You cleverly work a long row of half circles and then work back again, joining to the previous row as you go.
Yarn: The repurposed Wendy Happy bamboo/nylon sock yarn - because of the bamboo, this makes a lovely drapey scarf. I used just over 1 x 100g ball.

Hook: 3.5mm

Time: 2 March 2011 - 18 March 2011. And even though it's a project I completed entirely this year, I'm still counting it as part of my "binding off" commitment, given I frogged a pre-2011 WIP and re-used the yarn!
Modifications: My circles were smaller than the pattern specifications, so I made my rows longer by adding extra circles. And I did an extra row of circles - 5 rather than 4 - because I think an odd number of something looks more "right" than an even number.
The pattern was designed specifically for self-striping sock yarn, but I could see it working really nicely in a solid or semi-solid colour too. And it's also given me some ideas about thread crochet accessories too - I could see this method working well for a bracelet or cuff, or a necklace. Hmmm, watch this space!

Wednesday, March 09, 2011

You don't see that too often

Last week I did something which is a very rare occurrence in RoseRedville.

I frogged a WIP. Entirely. Right back to balls of yarn.

Yep, you heard right, I, RoseRed, who will Always Fudge Rather Than Frog, frogged.

Last year I started a Baktus scarf, with the remainer of the first ball, and the second ball of the Wendy Happy bamboo sock yarn (that I used for these socks). I had seen projects done using self-striping yarn, alternating the balls to get narrow one row stripes, and they looked really good. I thought this yarn would work well for this type of project.
But I just wasn't feeling the love. I ended up having a big wad of grey (even though I was still alternating the balls), and I also ended up cutting the yarn to avoid another big wad of orange. And I think the really small sticks (2.75mm) for a scarf was another reason I was less than enamoured.

And I also found another pattern (designed for self-striping sock yarn) which I thought would work better with this yarn. And so one night last week I just Did It (hence the crappy flash photos).
And in less than a week, I'm already 3/5 of the way through the new scarf (further along than this photo shows).
I think it is an improvement on the Baktus, although I do still like that pattern, just not my initial yarn choice for it. If I get around to making it again, I will still stripe it, but with plain colours instead! Yay for frogging (on the rare occasion that it is absolutely necessary!)

Sunday, September 26, 2010

And for a change...

And for a change, here's another FO!

A while ago (November last year!), I was visiting with my buddy D, who, in a fit of optimism, had bought the yarn and pattern to crochet a scarf for her daughter. In a similarly inspired fit of optimism, I offered to do it for her, because we all know crochet is quick, and the scarf only used 2 balls of 8ply/DK weight yarn.
Yeah, you already know how that turned out, just by the date of this post! But now it's done, huzzah!

Details
Pattern: Aroma by Donna Yacino, published by Berroco. A crochet scarf using a pretty motif and bands of filet or basic shell crochet between the motifs.
The pattern is relatively easy, but has that annoying "at the same time" business which tripped me up more than once. It's also completely written, and could have benefitted by using charts. I also think it could have been written to avoid some of the cutting and rejoining of the yarn (and thus minimising the number of ends to be sewed in). And finally, if I was to make it again, I'd also make it symmetrical - ie work from both ends into the middle. That's a relatively minor quibble though.
Yarn: 2 x 50g balls of Berroco Latitude, a very interesting cotton/rayon yarn comprised of many plies of slightly variegated yarn all wrapped with a fine strand of a darker colour. It's a mite stiff to crochet with but I think will wear nicely. It is slightly difficult to sew the ends in however! I imagine if you were knitting with it, especially stocking stitch, you'd probably have to separate the plies to sew them in in a way that avoids bulk.
Hook: 4mm

Time: 2 December 2009 - 30 August 2010. But really, this is a project which could be completed in a few days - I finished one ball of yarn some time ago (probably January) then got sidetracked, until mid-August, when I finally got it out again, after a timely prompt from D!!
Note on pattern: Interestingly, the pattern specifies 3 balls of yarn are required. I had some left from the 2 balls I used (not enough for additional motifs though). And I made the pattern exactly as specified, getting a length of 136cm/53".
You can see from the pattern picture however that the filet/shell sections between the motifs are much longer than the pattern calls for (with a specified total length of 158cm/62"). Clearly that's where the extra yarn went! Bit of a fail though on the part of someone at Berroco! Good way to add length though, if you want to, without making extra motifs.

Tuesday, March 30, 2010

Well, I am really Loving Myself Sick right now!

Yes, I'm pretty happy with myself today!

Why?

Because of this:
Yes! Babette is done! After just over a week solid of seaming, and a couple of days to crochet 3 rows around the entire edge, she is done! And I am Loving Myself Sick!

Details:
Pattern: Babette Blanket, by Kathy Merrick, from Interweave Crochet, Spring 2006 or from Interweave's web store. A modern take on the traditional granny square crochet blanket, this pattern is quite a hit with the crocheters. Done in 17 colours of 4ply/fingerweight yarn (Koigu, no less!), it really is lovely. Helped quite a bit by the fetching photography and beautiful girl "modelling" the blanket! But I must say, the use of so many different colours means just one thing: SO MANY ENDS! That put me off making this pattern for such a long time.

And then an inspired idea from a very smart blogger, combined with an amazing sale on Regia Kaffe Fassett yarns in the UK, meant the door opened for me to make this. Thanks so much Mooncalf and Kemps!

The pattern itself is made up of 2, 4, 6, 8, 10 and 12 row squares - if you use 17 colours, it tells you exactly which colours to use for which squares, but for me, using the self-striping KF yarn, in 3 colours, meant I just had to ensure I shared the colours around the differently sized squares.

Once the squares are done, the blanket is constructed in 10 strips, just like a log cabin quilt. I laid all the strips out on the bed and photographed each, then bagged the squares for that strip - it made it a lot easier to ensure that the different colours were spread around the blanket reasonably evenly! As I was seaming the strips, I felt just like a quilter hand-piecing a patchwork quilt (or at least, how I imagined one would feel). It was a joy watching each strip come together and the colour sing!
I blocked each strip once they were sewn together, then sat down to seam strip by strip.
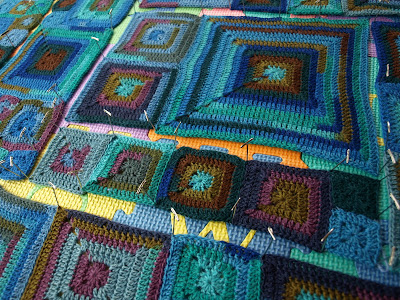
Yarn: Regia Kaffe Fasset Design Line 4ply sock yarn, 3 x 4251 (Landscape Storm), 3 x 4253 (Landscape Fog) and 4 x 4261 (Landscape Caribbean) for the blanket, plus 0.4 x 4253 for the edging (1 row) and 1 x 50g ball of Jaeger Matchmaker Merino 4ply in col 650 for the other 2 rows of edging plus for seaming (yarn from stash). I thought a plain colour sandwiching one of the striped yarns would work nicely for the border. I also used it for seaming all the squares - I figured no yarn would match perfectly, so I picked the best one from stash.
I picked those 3 KF yarns because they all seemed to co-ordinate nicely - they had common colours in each, but also complementary colours. That KF, he really knows his colours! I just wish I could capture the depth and variation accurately in my photos - it looks so much better in real life!

Hook: 3.5mm bamboo hook for all squares and two rows of edging, 3mm bamboo hook for last edging row. I think my hooks might be a bit small, but I'm still happy with the drape of the squares.
Time: 20 December 2009 - 29 March 2010. Making all the squares was so enjoyable, and even seaming this project (SO MUCH SEAMING!) was something I actually enjoyed for a change!
Modifications: I added an extra strip along the bottom of the blanket - because of the hook size issue, I thought the blanket might be a bit small without it, as I plan on using it as a cot blanket for Teddy. And I'm really glad I did, because I would have been right! As it is, it is 1m (36") wide, and just over a metre long.

Now I (or more correctly, husby) just need to put the cot together so Teddy will have somewhere to sleep!

Wednesday, March 03, 2010

Aw shucks

Today I gave a tutorial on crochet cables at my crochet guild meeting - not that I'm an expert, but since I have been working on my Solas Caomh I guess I have the most recent (or only?) experience with them amongst the group.

I did up a couple of small samples, a left crossing cable:
and a right crossing cable:
and wrote up the pattern and some notes for everyone.

I think it went ok. I hope so anyway! And I received a lovely thank you gift:
Teddy's first knitted hat! (I am slightly embarrassed not to have made one for him myself ... but now he has one!). All the ladies at guild are very excited, as this is "their" first baby too! It's very sweet!

Wednesday, January 27, 2010

Babette-ing along...

I've been pretty much obsessively crocheting my Babette squares for most of this month. So far I've used 6 balls of yarn and have made almost 3/4 of the required squares.

I decided I'd lay them out today to give myself an approximate size for the finished blanket. I didn't try to organise by colour or anything, just used the layout guide in the pattern to set up the two longest external strips.

I'm pretty darn pleased with my colour choices, I have to say!! (I've used 3 different Regia Kaffe Fasset Design Line sock yarn colours, 4251, 4253 and 5261) (although they look a bit more blue-er and washed out than they actually are!)

I think I will add an extra strip to make it a tad bigger. As it is now, it will be about 87cm/34" along the shorter side, and about 95cm/37.5" along the longer side. An extra strip will add another 20cm/8", which I think will be better. Of course, these measurements are all pre-seaming and pre-blocking, but I'm not sure that will make a lot of difference given I'm using machine-wash sock yarn?

But I am loving making these squares. An extra strip just means more of them! Weeeeeeeeeeee! (shhhh, don't mention the extra seaming!)