Showing posts with label stashbuster. Show all posts

Friday, June 29, 2012

To market, to market!

A few years ago, I bought some hemp yarn - it was on sale, and I was interested to try it. I finally made some time to do this earlier this year! A market bag seemed ideal - but which one!! There are so many patterns out there, and most of them free.


I am glad I settled on this one:
Details
Pattern: Ilene Bag, by Hannah Ingalls. I really like this pattern for a few reasons - it has a solid (stocking stitch) base, it has an easy pattern, and a nice open weave without being too open - even when stretched. It has a ribbed edge on the top, which is stretchy but not too open, and it has a ribbed handle which doesn't stretch too much. Oh, and no seaming! And did I mention it is a free pattern?!

It's a tricky thing, with a market bag, to make it stretch but not too much - you don't want it dragging around your ankles when it is full of goodies. This one is, dare I say it, pretty much perfect - a nice size, but not too huge and cumbersome.
Yarn: Hemp for Knitting Allhemp6, about 1.75 skeins in colour 21, a lovely periwinkle sort of blue. I'll be honest, it is hard on the hands, and I could only knit a few rounds with it at a time when I was doing the mesh part of the bag, but it feels really nice once knit up, and I know it will wash well (I haven't washed it yet, given I haven't actually used it yet!)
Sticks: 3.5 and 4mm KnitPicks Harmony Options. The ribbing and handles is done on the smaller needles, which is a great idea.

Time: 25 January 2012 - 25 April 2012. It had a little rest while it was part of the Easter Show display this year (I tucked the unfinished handle inside, so no-one was any the wiser that it wasn't finished!
Modifications: None at all! I'm really quite pleased with this bag. I think I'm going to use it as my project bag for my TdF project, actually! And I'm very pleased to have used up some yarn from stash!

Thursday, May 17, 2012

Little heads need little hats

So two of the mums in my mothers group have had new little people recently (and there are three more in progress!!  Yes, it's about that time, the 2 year itch, heh heh).

So I whipped up a little hat for each! All babies deserve a hand knit hat, right?
Details
Patterns: For the pink flavour, I used Easy Peasy Newborn Sock hat, by Keri McKiernan.  I modified it a bit as I used sport weight/5ply yarn rather than fingering/4ply - I just decreased down to 81 stitches after about an inch.

For the blue, I used the Very Basic Baby Beanie by Janet D. Russell.  I also modified this by casting on 80 stitches rather than the pattern's 72 stitches, as I wanted it a little larger. It is a wee bit pointy at the top, I perhaps should have finished a row sooner, but I wanted to keep the stripes even.

Yarn:  I used Debbie Bliss Baby Cashmerino for both.  It's a nice soft machine washable yarn, perfect for what I wanted!  And since it was in the stash...I used 23g of the fuchsia, and about 30g in total of navy and two pale blues.
Sticks:  3mm KnitPicks Harmony Options for the pink, and the blue ribbing, and 3.5mm for the blue stripes.

Time:  18-20 March for the pink, 18-21 April for the blue.

I'd better get cracking on 3 more! 

Tuesday, February 14, 2012

Faultline

I decided to make a birthday gift for one of my best buddies (for her ending-in-zero birthday).  I asked her what colour/s she'd like (without totally giving it away, but not very well, heh!) and she said teal green or blue.

I had a bit of a dig in my stash and came up with (I hope) the perfect yarn!  And I wanted a relatively simple pattern, a bit of lace but not too much, and one that would use up as much of the yarn as possible.

And this is what I came up with:
Details
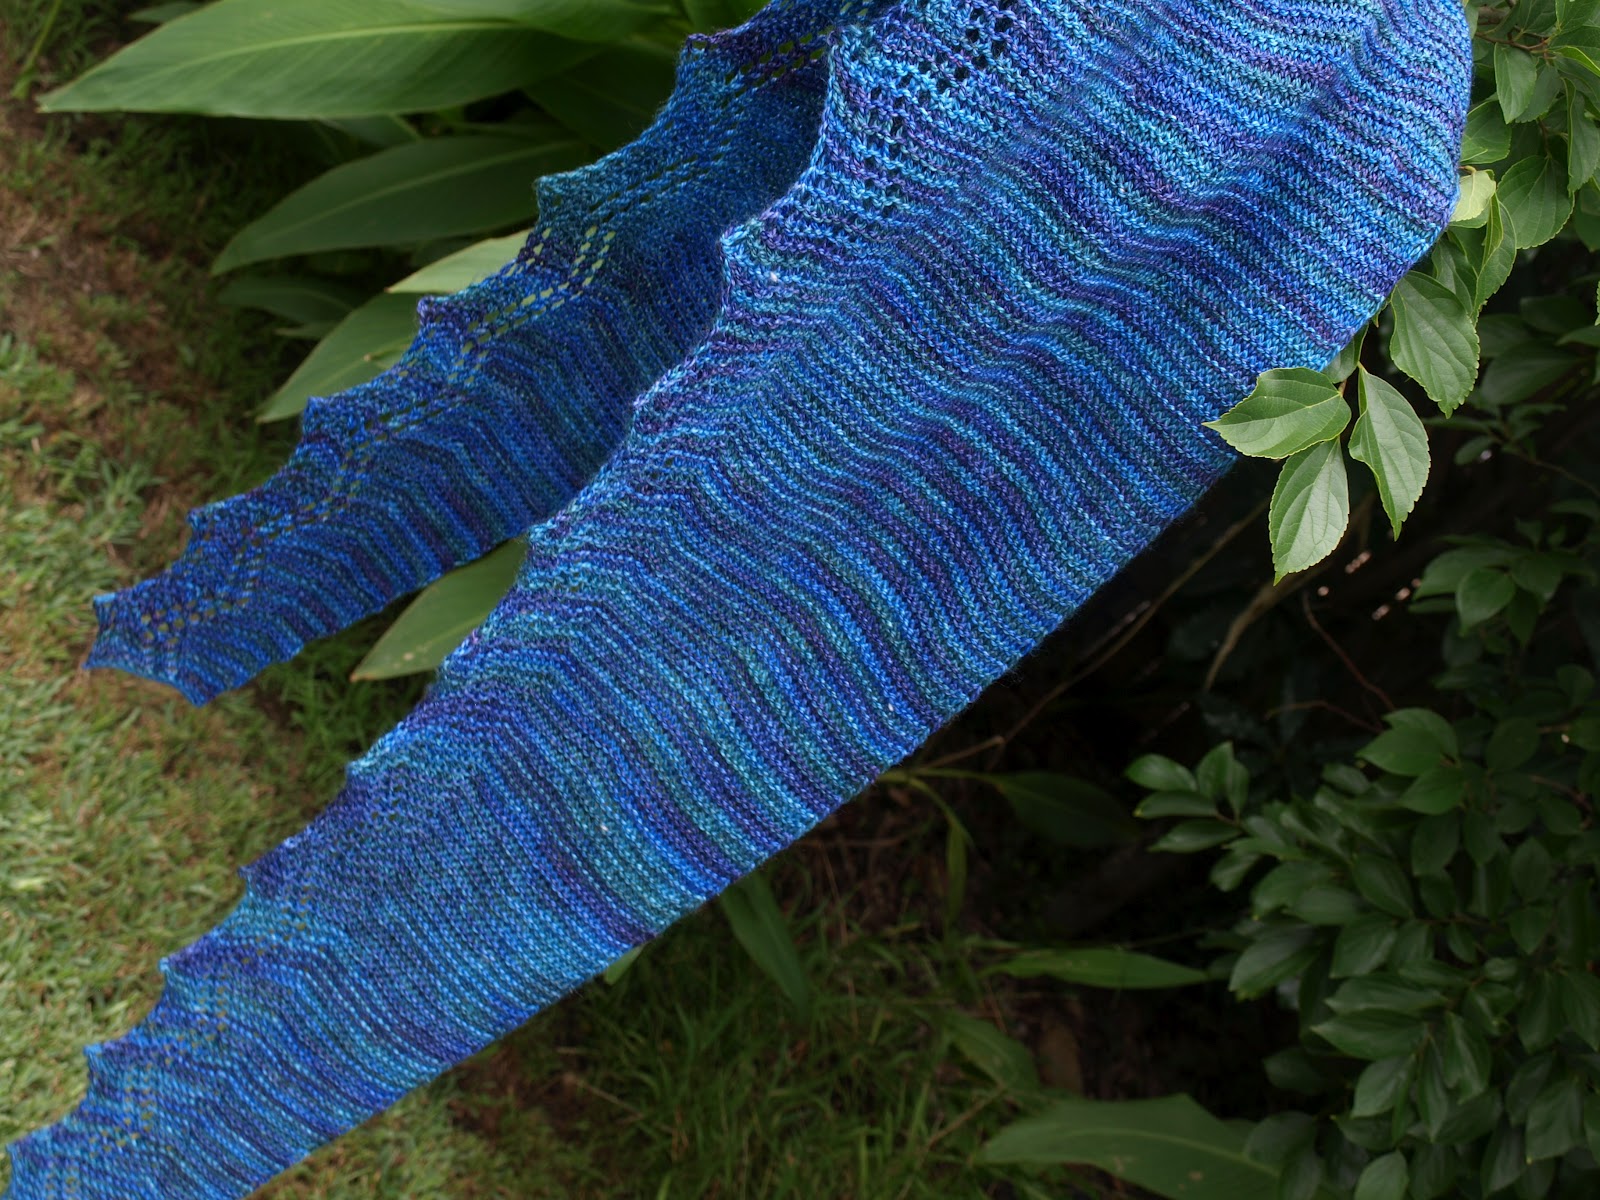
Pattern: Faultline by Gabriella Henry (one of my blog buddies, SweetP!).  She designed and sold this pattern to contribute to the fundraising after the Christchurch earthquake(s) last year.  Knit sideways, with a geometric lace pattern, it was the perfect choice.  And a nice quick knit too.  And it's not to late to purchase and have your donation counted for Christchurch.
Yarn:  Fleece Artist Sea Wool in (I think) Marine.  A lovely blend of teal, blue and purple, which of course I cannot capture accurately in photos!  The skein was 122g at the start, and I used all but 9g.  I got through 11 increase repeats, and then started the decrease repeats. If I was making this again, I would do another half repeat increasing, and then start decreasing. I think if I'd done that this time, I would have used all the yarn! 

The yarn is a70/30 blend of merino and sea cell - interesting texture, not as soft as I thought it would be, a little bit crunchy even.  It blocked out beautifully though.
Sticks:  KnitPicks Options, 4mm.  I'd think about using bigger sticks next time as this made quite a short scarf - just over a metre long before blocking.  But once I stretched it out after a nice long soak, the garter stitch relaxed beautifully and now it is a nice 1.65m (65").

Time:  9 January -30 January 2012.
I'm very happy with it - I hope Helen will love it too!

Friday, October 28, 2011

Bah Humbug!

A quickie that I knit up over a few days for a friend's birthday - something I have been meaning to make for a while but I finally got my butt into gear last week!
Details
Pattern: Red Comet by Loani Prior, from her Wild Tea Cosies.  A nice simple knit - two garter squares from corner to corner and joined in relevant spots to make a cosy.  So easy to knit to size, as you just make the square big enough to cover around your tea pot (from handle to spout), and then start the decreases! The pattern uses buttons as the "seams" to join the two squares, but I just sewed and crocheted in the relevant spots.

Yarn: Cleckheaton Country in black and white - just over 2 balls in total, for a medium sized teapot.  The stripe pattern is completely random.  I had more black than white so decided to make the black stripes wider, in general. It is meant to mimic the look of the old fashioned boiled lollies (humbugs, bullseyes etc).
Sticks:  The yarn is held doubled, so I used 6mm sticks - KnitPicks Options.  And a 4.5mm crochet hook to crochet around the edges of each square, to even out the lumpy garter edges.

Time:  21 - 24 October 2011.  As I said, nice and quick!    Happy birthday DrK!

Wednesday, October 05, 2011

Knit for Connor month: Floyd Vest

This is my third and final instalment of Knit for Connor month (which should more correctly be called Knit for Connor Two Months, since I made most of this in September rather than August!).
When I was planning the projects for KfCm, I found something very interesting - well, to me anyway.  And perhaps those also knitting for small children.  The sizes are SO INCONSISTENT!  It shouldn't come as a surprise, really, given that this is also the case for women's clothing (I can't really speak for men!).  But it is annoying, because it makes it very hard to knit in advance.  I knit the 12-18mo size in the Pembroke vest, and it is a good fit with a bit of room for next year (and with any luck, the year after, since people who know tell me small kids tend to grow up more than out for the first couple of years!).  This vest I knit the 3yo size, because I had enough yarn and I thought I might as well.  And what do you know, it fits pretty perfectly now.  With a little bit of room, maybe less than the Pembroke vest.  Although to be fair, I haven't blocked it yet, and being cotton it might grow!  And I even made it a wee bit longer than the pattern specified!!

Details
Pattern:  Floyd vest, by Martin Storey, from Rowan Miniature Classics.  This is a lovely book of baby and toddler patterns.  Sizing issues aside, I will definitely be making more from this book.  I hope!

As with almost all Rowan patterns, it is knit flat and seamed.  It could be converted to knit in the round if you desire, although the shoulder and side seams are fairly short and don't take much seaming really!
Yarn:  Rowan Handknit Cotton, 3 x 50g skeins in red (shade 215 lot 3883038).  I liked knitting with this cotton, although it definitely is harder on the hands than wool.  It knits up really nicely though, I am very happy with the way it looks.

Sticks:  I started this when I was away, and even though I grabbed my set of KnitPicks Harmony Options, I found I didn't have the correct size for the ribbing (3.25mm) so I used 3.5mm instead, and I think it looks fine!  I used 4mm for the main part of the vest, as specified by the pattern.

Time:  27 August 2011 - 28 September 2011 (it took me a little while to sew on the buttons!)
Modifications: I knit the vest as specified, except for the change in stick size noted above for the ribbing.  However, I omitted the pocket, because it really is pointless.  Not big enough to be useful, and for some reason which I cannot fathom, the pocket flap does not have a button hole, even though the pattern shows it with a button on it.  The flap is knit separately and then joined to the front of the vest as you knit it (very clever!).  But the pocket itself is seamed on afterwards.  I figured it would just add bulk and drying time, and as the flap had a tendency to stick up, I thought I'd just sew it down when I added the button.
The button-hole-less pocket flap!
If you want a useable pocket and flap, I'd suggest adding a buttonhole to the flap when you knit it!

I think this is a very cute, easy and practical knit.  I just wish that the size was a little bigger so it would fit for longer!  Next time, I will pay more attention to the schematics and Connor's actual measurements!

Tuesday, September 20, 2011

Knit for Connor month: Lillen Pantses

Even though this is the second project I've posted in my Knit for Connor month, it was actually the first completed.  It just took me a while to put in the elastic (as usual, it's the final touch that makes the garment useful and wearable that takes me forever!).

I recently bought the MillaMia book The Close Knit Gang.  It's a fab little pattern book for toddlers, with really cute and stylish garments mostly sized up to about 5 yo.  I chose the Lillen Pant(ses) pattern first, as I thought it would be a really good way to use this yarn - from stash - woo hoo!
Details:
Pattern:  Lillen Bottoms 12-18 mo size, from The Close Knit Gang.  These are really cute little pantses, knit flat in two identical pieces.

Yarn:  The MillaMia yarn (which is lovely, by the way) is really a sport/5ply yarn.  But since I am trying to knit from the stash, and my stock of sport weight yarn is fairly limited, I thought I'd use this skein of Wollmeise 100%, in one of the club colours, Saami.  It's a colour that really screams out to be used for kids, I think, given the primary colours!  I even swatched, to check whether I'd need to knit a size (or more) up to make up for gauge differences.  I was surprised to find I got gauge with the suggested needles, even though the WM is really a fingering/4ply weight.  I used about 115g of the 150+g skein.
What was really interesting was that even though the two pieces are knitted the same, one piece pooled and flashed substantially more than the other! (it is actually much more obvious in the photo than in real life, although once you have seen the photo, you can't unsee it in real life!)

I am also glad the WM is machine washable!
Sticks:  3mm and 3.25mm KnitPicks Options.
Time:  25 July 2011 - 12 August 2011. 

Modifications:  The pattern has a ribbed waistband. I didn't really think it would stay up very well, especially with a crawling baby (Connor hadn't yet started walking when I started these!).  So I did a stocking stitch turned band (with provisional cast on) to act as a casing, so I could put elastic in.
I also did garter stitch on the "hem" of the pantses, rather than moss stitch - only because the moss stitch fights too much with the varigation of the yarn.  If I was making these in a plain yarn, I would probably do the moss stitch.  I would also make them a bit longer!  I made these to the pattern length, but I think they could be a little bit longer.  Just a wee bit, mind!
I'm quite happy with these!  Gotta love a child who is too small to reject the handknits! (hopefully he will never reject the handknits, heh!)

Sunday, September 04, 2011

You can never have too many

You can never have too many pairs of red socks, right?

I needed a nice easy portable project a while back (um, in February...) and what better choice is there than stocking stitch socks with a pretty yarn?  (let's not mention that I actually wound this yarn in May last year to take to hospital with me.  Yeah, it never left the project bag!)
I finally finished them, and seem to have taken almost as long to get around to posting them as I did knitting them!

Details
Pattern:  Just my basic cuff down plain vanilla socks!  Although I did add some calf shaping into these.  I think I started with 72 stitches and steadily decreased down to 64, as I moved down the leg.  I did a tubular cast-on and twisted rib, and my favourite eye of partridge heel flap, and wedge toe. 
Oh, I did do something different, I did a dutch heel, from Nancy Bush's Knitting Vintage Socks.  Thought I'd try it out, as others have commented on how they like it.  I don't mind knitting it, but I don't think it fits my foot as well as a regular heel.  Good to know!
Yarn:  A new yarn for me, Cascade Heritage Handpaints, a lovely blog prize from GeekKnitter.  I like this yarn, it feels nice but still sturdy, and I like how the colours behaved, with a subtle blue and purple stripe effect.  I would use this yarn again for sure.

Sticks:  2.5mm KnitPicks fixed circular, for magic looping - my favourite method for plain socks.

Time:  2 February 2011 - 1 August 2011.
And a nice little bit of leftovers which go straight to the Beekeeper Quilt yarn fund, heh!

Wednesday, August 10, 2011

I must be(e) crazy!

I first saw the Beekeeper's Quilt early last week on Ravelry.  As some designs tend to do, it kept popping up in my friend's activity tab, being favourited and/or queued by lots of people.  And I thought it was cute, but that was it.

But then something happened, and I'm not even entirely sure how.  But I couldn't stop thinking about it.  And how nice it would be all done in shades of red (how unusual for me!  Heh heh!).  But I didn't buy the pattern straight away.  I figured if I still couldn't stop thinking about it after a week, then maybe I should buy it.

And yesterday, I did!  And I went stash diving and gathered up my red sock yarn leftovers (reds and red-purples and red-oranges and a few red-pinks).  I also just might have bought a ball of heathered red yarn last weekend at Morris & Sons, and I have quite a bit of solid red 4ply/fingering yarn which MissFee picked up for me at the Wang mill last year.  But funnily enough, I don't actually have that much variegated and semi-solid red yarn leftovers.
And I made my first hexapuff.  And my second, and third, and fourth, and fifth (and I'm knitting my sixth right now!).  Each one uses somewhere between 11-15m (according to others on Rav who have knitted and then frogged one - I can't bring myself to do that, heh!).  So I'm going to have to accumulate some more red leftovers (or use whole skeins of sock yarn, which is perhaps a good idea - I mean how many pairs of red socks do I really need, heh!!)
I figure if I can make 5 each week then it will only take me, oh, nearly 2 years, to make one to cover a queen size bed.  See, I told you I must be(e) crazy!  Is anyone else going to join me?

Wednesday, June 29, 2011

Thank you Baby Cardigan

You might recall a few months ago I was the lucky recipient of another knitter's (thankfully small but good) stash (the mother-in-law of one of the mums in my my mothers group).  I promised you (and myself) that I would make a little something out of some of the yarn I received for this knitter's granddaughter.  I hoped that this is what the knitter would have wanted.

Last week, I handed over this:
I used some of the Heirloom Merino Magic from the gifted stash.  I didn't have enough of one colour for a whole garment, so thought this was a good pattern for colour-blocking while still being pretty (I didn't want to do stripes as I figured I'd be doing enough stripes for Connor over the next few years!).  I used the cream (2 balls) for the fronts and bands, a whole ball of lilac for the back, and almost a whole ball of green for the sleeves.  I had a ball of blue as well, I initially thought I'd do one sleeve green and one blue, but after finishing one sleeve, I knew I'd have enough for the second sleeve.

Details
Pattern:  Provence Baby Cardigan by Cecily Glowik MacDonald.  This is an easy pattern, mostly stocking stitch with a moss-stitch edging and pretty lace leaf motif on the front.  I did make some modifications to the pattern (see the mods section below).

Yarn: Heirloom Merino Magic, 3.5 x 50g balls
Sticks:  4mm KnitPicks Harmony Options (3.75mm for the neckband).

Time:  9 May 2011 - 3 June 2011

Modifications:  I knit the body of the cardigan in one piece - which meant I had to do INTARSIA!!!  I swore never to do intarsia, ever!  Although really, just changing colour twice in each row, in a straight line up the side "seam", probably doesn't count as real intarsia.  But I still did it, and it worked!  Although getting the two balls of cream and one of purple tangled every so often was annoying.  But hey, no seaming!
I also knit the button band at the same time as the body of the cardigan.  This resulted in a bit of a puckered button band (may have also had to do with my not-so-great buttonhole skills!), which probably wouldn't have happened if I'd knit it separate and seamed it on.  Thankfully blocking evened it out, mostly...

And I knit the sleeves in the round, from the top down!  They were basic drop sleeve style sleeves, so it was easy to pick up stitches from the armhole and knit downwards, decreasing at the same rate as the pattern specified increases.  It was a bit messy under the arms, but I stumbled through and fixed it up when I darned in the ends (there were small holes where I'd joined to knit in the round.

I also added neck shaping on the back (so it would come down a bit lower on the back, not right up against the neck).  This was partly because I was worried I'd run out of the lilac yarn with a row or two to spare!  as it was, I only just squeaked it in!

And finally a three needle bind off for the shoulder seams.  And thus no seaming at all in this garment, woo hoo!
And best of all, the mum was very touched by the gesture.  It really is a lovely thing to knit for others.

Sunday, June 05, 2011

For the maths geeks

Last weekend our parents group held a combined first birthday party for our babies (are they still babies once they are one?  I guess so, since he isn't a toddler yet, but he's just so much bigger than a newborn!).  I volunteered to make the cake:

and we also did a gift exchange, so I thought I'd make one of these:

And it was fun - mostly!

Details
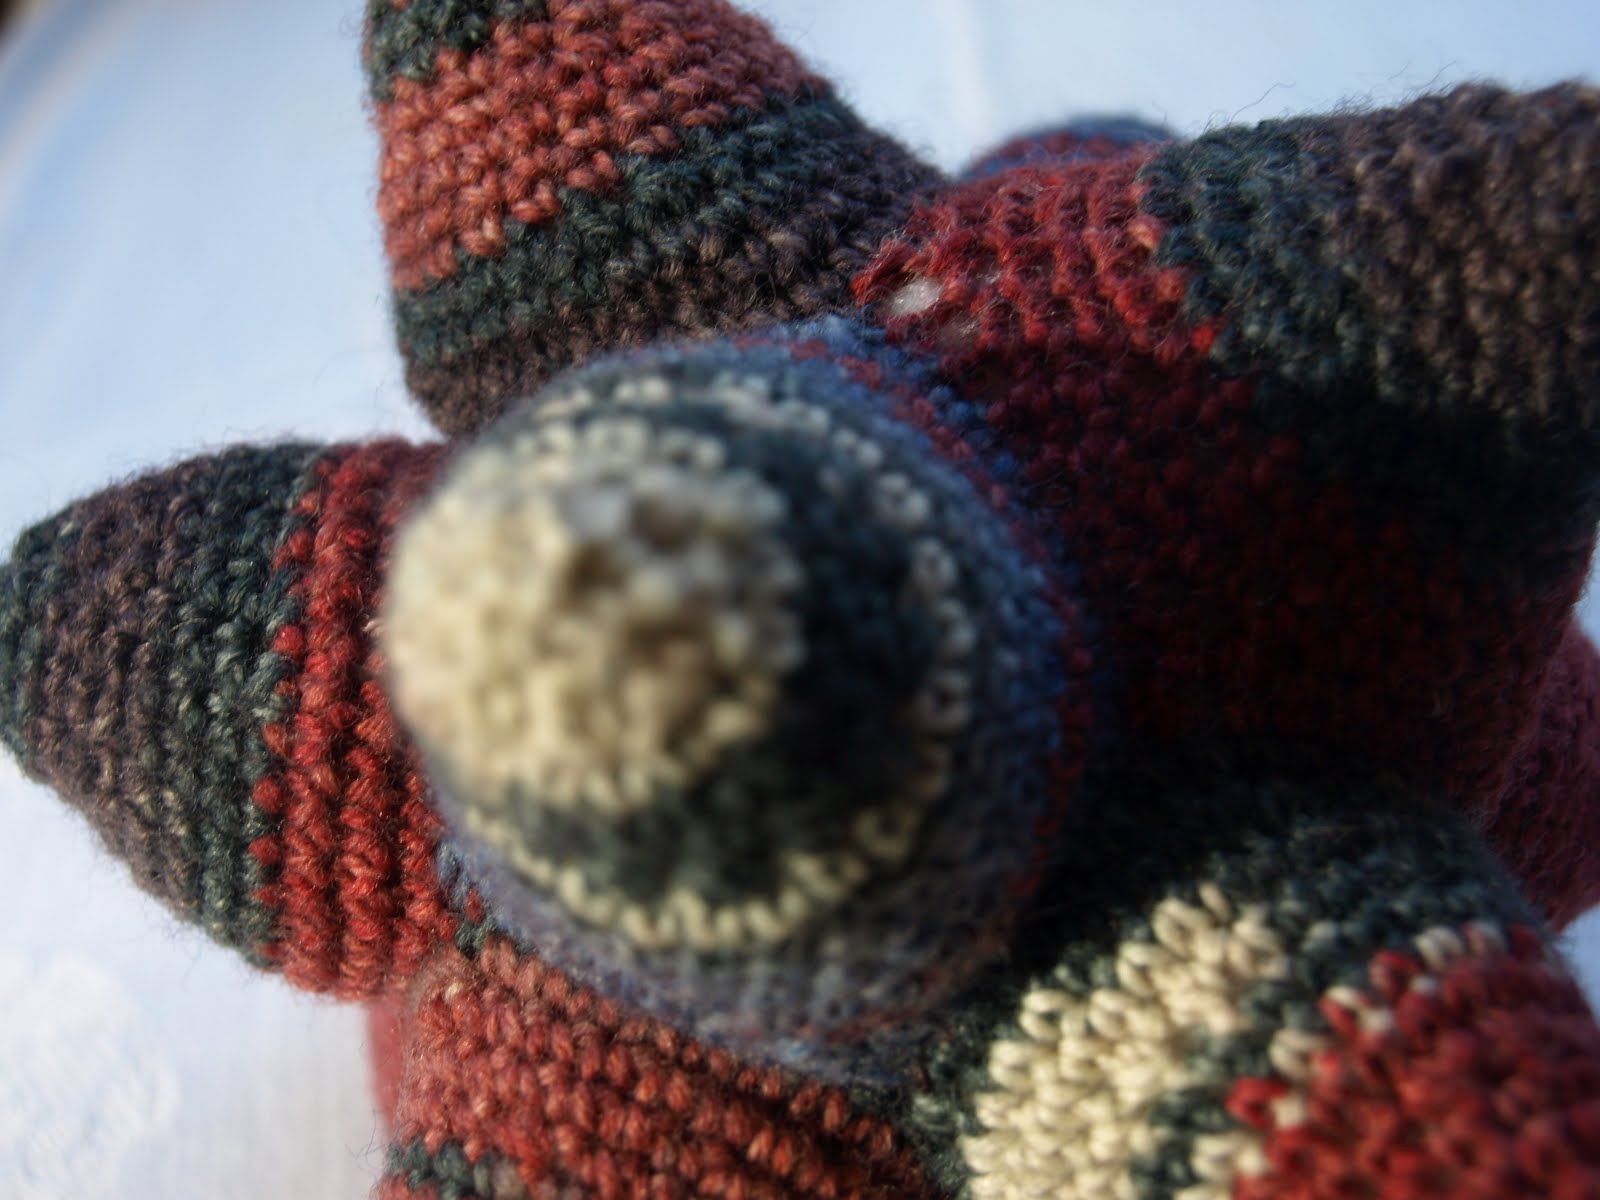
Pattern: Celestine Crochet ball by Betsy Myles - a free pattern, yay!  A few people complain on Ravelry that this is a bit of a confusing pattern, or not well written.  I think it's written fine - you start off with a chain loop and steadily decrease to the point, then add another point building on the last one (got to love a join-as-you-go project!), but I did have trouble starting off each new point, more because I kept forgetting how I got it started the last time.  I think I managed to get it right after I'd made about 8 or 9 of the points!  Oh dear!


Half done!
 So I took some pictures, so hopefully I will remember next time, because I would like to make another one, they are pretty fun, and unusual looking - it's a 12 pointed star, a sort-of dodecahedron!  I just like saying dodecahedron, really!

Foundation row for new point
Yarn: Opal 4ply sock yarn col 1232.  Only 32g, so you can easily get 3 of these from a ball of sock yarn.  Or possibly from leftovers, if you'd already made socks!  You can use any size yarn, it will just affect the size of the end product.

Hook: 3mm

Time: 20 May 2011 - 27 May 2011 - a week, not bad!  I think it took me around an hour for each point, with all the unpulling every time I started a new point and forgot how to join the darn thing so it didn't twist and was facing the right direction!

Modifications: I made the pattern as written, but rather than doing the chain first and then the crochet into the previous point(s), I did the crochet into the previous points first, then the chain.  For some reason, this was easier to work out the joining. 

There's also a small error in the pattern when starting the 11th point, you only do 7 chain, the rest are all crochet into previous points.

The last point was very fiddly, but I managed it ok.  When stuffing the ball, I also put in a cat toy to give the ball a "rattle".  I was worried the stuffing might muffle the noise, but it comes out nice and clear, without being annoying loud like some (many?!) kids toys!

Thursday, May 12, 2011

Connor's birthday vest

Now what sort of knitter would I be if I didn't make the little fella a new handknit item to wear for his birthday (I guess I'm lucky his birthday falls in mid-autumn and not mid-summer, heh!).

As it can still be quite warm around this time of year (just not yesterday, brrrrr), I thought a vest would be best.  And I had this lovely handspun from my clever knitting and now spinning friend Ms Funky.  Perfect!

Details
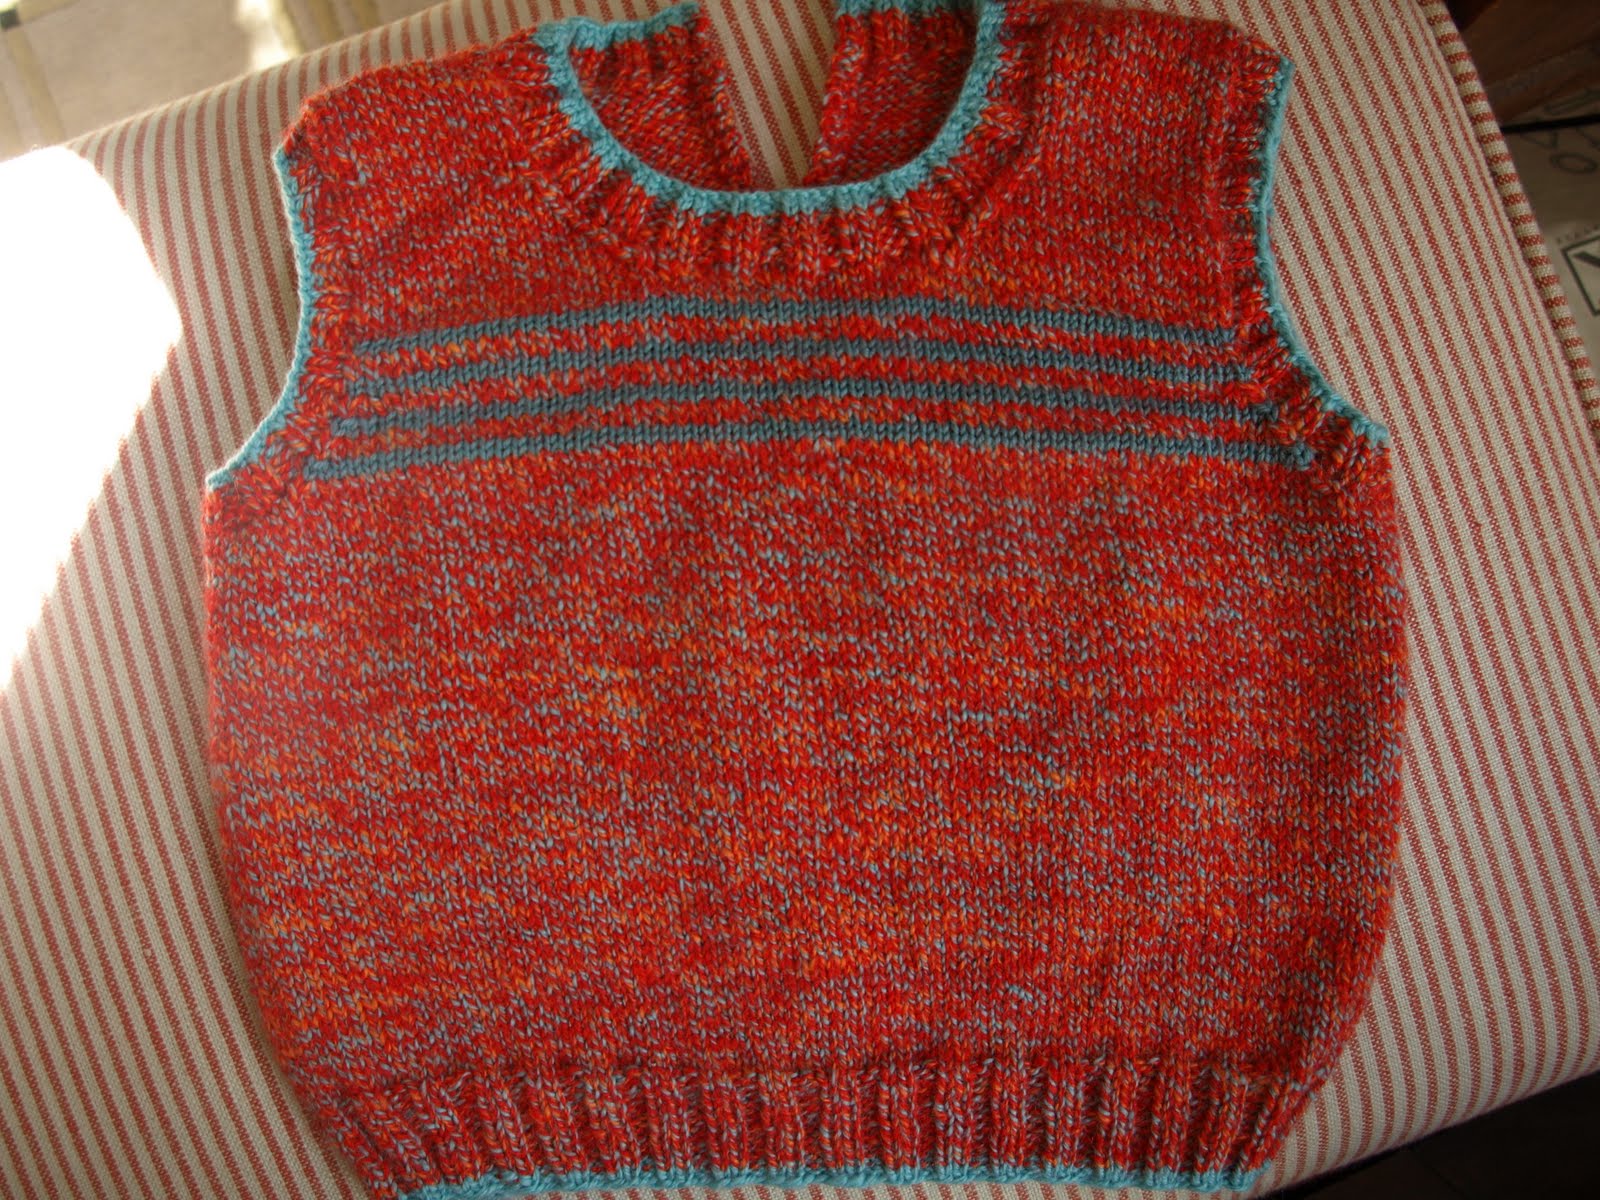
Pattern:  Argyle Slipover from Special Knits by Debbie Bliss.  Of course, I omitted the argyle, and I converted the pattern to be knit in the round up to the armholes and then flat.  I also did a three needle bind off for the shoulder seams and knit the armhole bands in the round.  Of course, even with that, I still had 20 ends to sew in once the knitting was done - gah!!

I wasn't sure I'd have enough of the red for the body, so I added in a couple of stripes across the chest, just to be safe.  I was knitting pretty close to the wire, deadline wise, so I didn't want to have to rip back in case I ran out.

As it turns out, I would have had enough, but I still like the stripes!

Yarn:  150g of Fruit Salad handspun from Ms Funky, plus some of the turquoise colour for the contrast edging.  And about 5g of Rowan True Botany 4ply in a similar-ish turquoise (shade 552 Frost) for the stripes.

Sticks:  3mm and 3.25mm KnitPicks Harmony Options.

Time:  17 April 2011 - 6 May 2011.  Just squeaked it in, with time for a wash and block the day before his birthday (thank goodness it was sunny that day!)
Paired with his new jeans (from Gap!  Yay for having Gap in Australia finally, although booo for how expensive it is), I think he looks pretty darn cool!

Friday, May 06, 2011

Strength in every stitch

At around the same time as we were all devastated by the earthquake and tsunami in Japan, one of my friends lost her mother unexpectedly. So I did what knitters in these circumstances so often do. I got out my sticks and a special yarn and, using a pattern sold to benefit the earthquake relief funds, I made a shawl for my friend.
Details
Pattern:
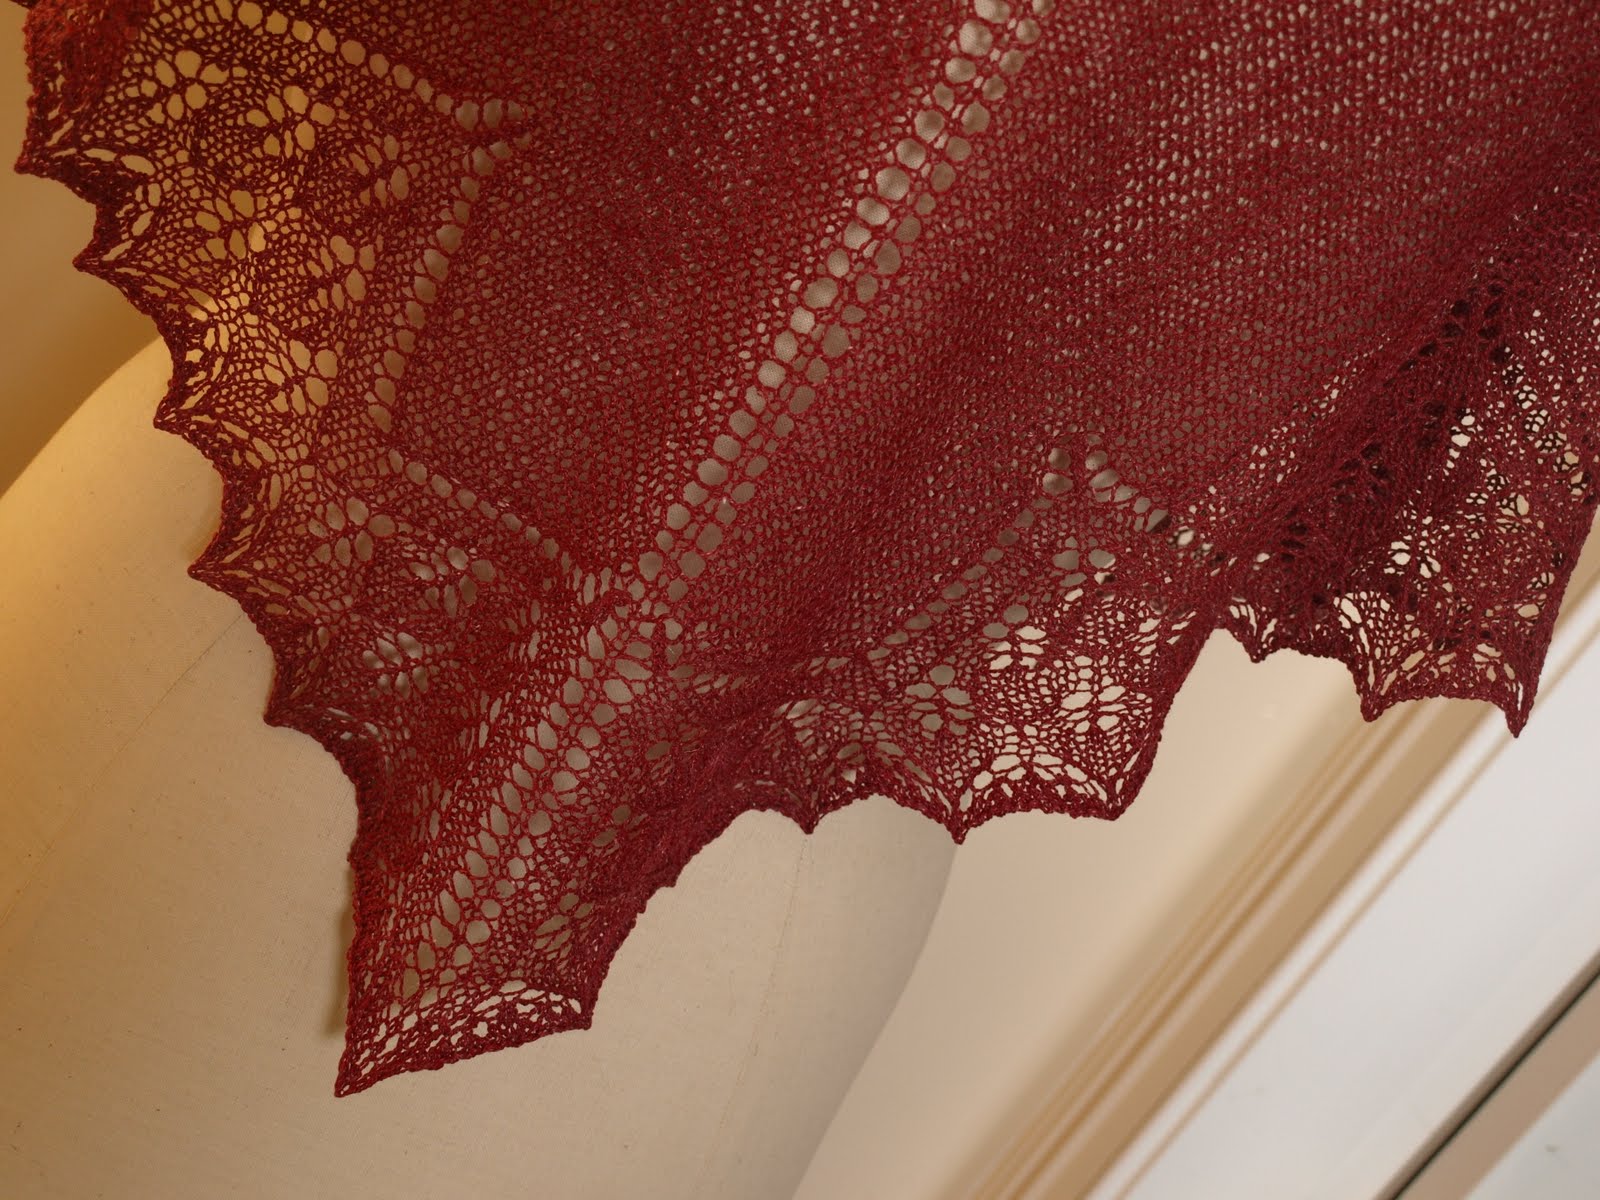
eiki, by Janel Laidman. This pattern was designed and released just after the devastation in Japan, and the profits are donated by the designer to various disaster relief funds. According to the designer, eiki means "strength" in Japanese, and I thought that was exactly what my friend would need in the times ahead of her.

The pattern itself is a small shawl, the main portion done in garter stitch and the edging in stocking stitch with a lacy leaf pattern. It will use a largish skein of sock yarn, although I used a laceweight.

Yarn: Habu Tsumugi Silk! In red #52, from the stash. Japanese yarn, for a friend who loves this yarn, for a pattern to aid Japan. Couldn't have been more perfect, really. And it had the specified yardage as required by the pattern - although surprisingly, I had about 100 yards left over. This is an interesting yarn - a bit rough to knit with, but not uncomfortably so, but yet soft in the knitted fabric.

Sticks: 3.5mm KnitPicks harmony options. I perhaps could have gone up a size or two, but being garter stitch, I didn't want it to be too open and stretchy.

Time: 18 March 2011 - 11 April 2011. Not bed for me and lace knitting, thanks in part to working on it while we were on our holiday!

I was interested to see how it would grow on blocking, and discovered not a lot! It didn't really grow at all across the top (about 1m/40") across, but did grow down the spine, from 43cm/17" to 52.5cm/21". So a small shawl indeed, or a large neckerchief! But one with thoughts of strength, love, life and hope knitted into each stitch.

Thursday, April 28, 2011

Fit for a (royal) wedding?

I do love to wear a hat to a wedding.  It's a dying tradition in Australia (perhaps everywhere) but I have done my bit to keep it alive.  There's just something about a hat that makes an outfit special.  I suppose it's partly because it's so rare to see them at weddings any more, that's what makes you stand out!

I'm seriously considering wearing a hat on Friday as I watch the royal wedding on tv ... I watched Charles and Diana, and Andrew and Sarah, and Edward and Sophie, and even Charles and Camilla.  I will totally be watching William and Kate!  I'm not a monarchist by any means, but there's just something about a royal wedding which totally appeals.  It's probably the frocks.  And the hats.  I'm sure it's the hats!

I made this one a while back, but didn't get a photo shoot for ages, and then I sort of forgot to blog it, until now!  Thanks to my friend Miss J for modelling so fetchingly for me!

Details
Pattern:  Modest Cloche by Jennifer Hansen.  I have long admired this pattern, I do love a cloche hat, and there was just something about this one, perhaps it's the flower, perhaps it's the angle of the project photograph, I don't know.  But I was glad to be able to finally make it!

Yarn:  Silky Merino by Malabrigo, 2 skeins in grey green (a lovely birthday gift from Bells).  This was actually not quite enough - I didn't have enough to do a full flower, so only managed a small one (which also curls somewhat annoyingly), but I think it's ok.  If you did the flower in a different yarn or colour, 2 skeins would definitely be enough!  This is a gorgeous yarn, especially nice to crochet with.

Hook:  2.25mm hook - the pattern suggests a 2.75mm hook - I didn't have one, so tried 3mm (too big), 2.5mm (still too big) and then 2.25mm (just right!).  I'm not actually sure I've ever seen a 2.75mm hook before, I shall have to keep an eye out for one in future.

Time:  30 January 2011 - 21 February 2011.  I actually finished the hat itself on 7 February (crochet is SO QUICK!) but tried to get some extra yarn to ensure I had enough for the full flower (via the ISO thread on the Australian Knitters board on Rav).  None was forthcoming (I knew it'd be a long shot) so I just went ahead with what I had.

And I'm pretty darn happy with it, really!  The cool texture is done by front post stitches, and the "gathered" part on the top of the head is done by varying the stitches on each row (treble at back, then transitioning through half treble to double crochet - I'm using english terminology here!).  Very clever pattern!

Now what hat to wear on Friday...I think it should have some feathers...